In the last post, I talked about how I setup my Nomad cluster running on bare metal using Void Linux and Ansible. I talked a lot about the basic design, but not how I actually executed on that design. That’s what we’ll get into in this post.
There are 3 main elements to configure in the cluster. First, the network, routing, and data-plane needs to be configured as a foundation that can be used to PXE boot the rest of the fleet, and then managed on an ongoing basis. Second, the Operating System (OS) on the servers needs to be configured to run the services that will make this selection of machines into a Nomad cluster. Finally, Nomad itself needs to be configured with security policies and other runtime tweaks to suit the applications that I want to install into the cluster.
Building the Network
Lets start with the network, since that’s the building block that the entire rest of the cluster stands upon.
From the last post, you know that I am using a Microtik RB3011UAS+RM which provides me with a very capable Ethernet router. I manage this device using Terraform and this provider. This allows me to get a preview of any change that I am considering making to the network, and if necessary roll back changes with confidence that I have captured everything I changed.
Terraforming physical hardware is different from the cloud, as you usually need some kind of bootstrap config keyed in by hand to setup just enough of a connection that Terraform can then access the hardware and continue to provision it. There are many ways to solve this problem, but for RouterOS, I choose to reinstall the entire device OS and use a “user script” during install to configure the absolute bare-minimum required for Terraform to talk to the device. In my environment this looks something like this:
/interface/vlan/add comment="Bootstrap Interface" interface=ether1 name=bootstrap0 vlan-id=2
/ip/address/add address=100.64.1.1/24 interface=bootstrap0
/user/set admin password=password
/ip service
set www disabled=no
These 5 lines of configuration data are enough to install the OS,
configure a bootstrap interface on VLAN 2, and create the default
admin user with a password. The last 2 lines ensure that the www
service is not disabled, which makes the API accessible.
In a production environment, you would generally also want to setup TLS here, but when I can see both ends of the cable that I’m using to bootstrap the system and one end is in my laptop which is necessarily trusted for this process, I can be reasonably sure nobody is eavesdropping on me.
Once I can connect, its a simple matter of having Terraform dump in
the rest of the configuration data to the network. There’s something
about this that is extremely satisfying, because you can actually have
all the cables hooked up and then just push in a complete system
configuration. Watching BGP come up mid way through the terraform apply cycle is a very satisfying result to the work it takes to
achieve this level of configuration capture.
The last step of my network bootstrap is to remove resources that
terraform doesn’t know about, namely that bootstrap0 interface and
its associated IP. Leaving them doesn’t necessarily hurt anything,
but can cause strange behaviors when the underlying physical port is
managed by Terraform. A quick command to remove the VLAN is the last
time I touch the device by hand, as from this point forward, I can use
automation to make any further changes I need in the network.
Configuring Void Linux
Void Linux is a conventional multi-user general purpose Linux distribution. As such, it works well with tools like Chef, Ansible, and Salt for configuration since it adopts many of the same models that those tools are good at configuring. I use Ansible most frequently, so this was a natural choice for configuring my Nomad cluster.
I layer my Ansible playbooks, so I have 3 that every machine needs to run through:
-
bootstrap.yml: This playbook consists of a single raw command to connect and install Python. It is not generally necessary anymore because I install Python as one of the very last steps during machine install, but I keep the playbook around in case I need to bootstrap a machine that didn’t go through the automated install. -
base.yml: This playbook configures everything that’s common across all machine types. This includes SSH, repository and mirror settings, making sure NTP is synchronized, and similar baseboard configuration tasks. -
nomad.yml: As the name implies, this playbook actually installs Nomad and joins the worker nodes to the larger cluster. The file actually contains two different plays back to back which target Nomad servers and clients independently, but having one playbook has improved ergonomics to actually use day to day.
Once I run the three playbooks against a host once, Nomad is up and running, and I can use more sophisticated automation to manage the system long term, which we’ll look at at the end of this post.
Configuring Nomad
Nomad has relatively little that needs to be reconfigured, but does have a handful of tunable settings mostly related to elevated permissions assigned to a handful of jobs, and configuring the anonymous policy to allow snooping on the cluster without logging in. Since my network perimeter is well contained, I am willing to make the trade-off for convenience to be able to look at the contents of the cluster without authenticating.
Nomad is configured via API once the server is up and running. You can technically use the UI for this, but that mostly just presents a series of boxes for you to paste in policy language fragments, and I would prefer to maintain my entire cluster using IaC techniques, so its time for more Terraform. The policies being loaded are not complex, the most complicated one in the system to date is a permissions over-grant to Traefik:
resource "nomad_acl_policy" "proxy" {
  name = "proxy-read"
  job_acl {
    namespace = "default"
    job_id    = "proxy"
  }

  rules_hcl = <<EOT
namespace "*" {
  policy = "read"
}
EOT
}
This is an over-grant because Traefik does not need, and therefore should not have, full read in all namespaces. All it actually needs is the ability to list and read services in all namespaces, but like all production systems, this temporary fix has lived far beyond when it should have been revisited.
Ongoing Upkeep
I’ve alluded several times now to solving some of the fundamental problems that Ansible has when scaling out, so its time to stop teasing and look at how this is accomplished. In a nutshell, this magic is accomplished by using a Nomad system batch job that schedules onto every machine in the fleet and runs Ansible in a sort-of pull mode. I say a sort of pull mode because this isn’t done using Ansible’s built-in pull mnemonic, this is done using Ansible running inside a container.
I run Ansible from a container because this allows me to make the configuration management system not only independent of Git by baking in the specific files from any given Git revision to the image, but also baking in Ansible itself to the image so that its entire Python runtime comes along for the ride. Since I need to make use of some custom collections, this works really well.
Lets look at the Dockerfile that I use to build this container:
# syntax=docker/dockerfile:1-labs
FROM alpine:latest AS ansible
WORKDIR /ansible
RUN --mount=type=bind,source=requirements.txt,target=requirements.txt \
    apk update && apk add python3 bash tini && \
    python3 -m venv venv && \
    ./venv/bin/pip install -r requirements.txt && \
    ./venv/bin/ansible-galaxy collection install void.network

FROM ansible
ENV ARA_API_CLIENT=http \
    ARA_API_SERVER=http://ara.matrix.michaelwashere.net \
    ANSIBLE_CALLBACK_PLUGINS=/ansible/venv/lib/python3.12/site-packages/ara/plugins/callback \
    ANSIBLE_ACTION_PLUGINS=/ansible/venv/lib/python3.12/site-packages/ara/plugins/action \
    ANSIBLE_LOOKUP_PLUGINS=/ansible/venv/lib/python3.12/site-packages/ara/plugins/lookup
COPY --exclude=*.txt . .

LABEL org.opencontainers.image.title="Ansible Configuration" \
    org.opencontainers.image.description="Complete Ansible configuration for the Matrix" \
    org.opencontainers.image.licenses=Proprietary \
    org.opencontainers.image.vendor="M. Aldridge" \
    org.opencontainers.image.authors="M. Aldridge"
This container does a few important things. First it uses the
1-labs version of the Dockerfile syntax, which is necessary to gain
access to --exclude on the COPY instruction. I can’t add the
requirements.txt file to the .dockerignore because then it wouldn’t
be included in the context used to bind mount it into container during
Python module install. Second, it makes use of --mount=type=bind to
bring in the requirements file, which I don’t actually want to end up
in the container, but I need temporarily to make the virtualenv. This
is a neat trick if you didn’t already know it for bringing in
non-secret information to a build. Finally, the build is structured in
such a way that there are specific layers that change frequently, and
they are the ones that are on the very very top of the stack
containing the actual Ansible configuration files. Structuring the
build in this way improves caching dramatically.
This results in the container having Ansible installed in a virtualenv, and then having this file structure adjacent to it:
.
├── ansible.cfg
├── base.yml
├── bootstrap.yml
├── group_vars
│   ├── all.yml
│   └── nomad_client.yml
├── host_vars
│   └── matrix-core.yml
├── inventory
├── nomad.yml
└── roles
    ├── chrony
    │   └── tasks
    │       └── main.yml
    ├── docker
    │   ├── handlers
    │   │   └── main.yml
    │   └── tasks
    │       └── main.yml
    ├── nomad
    │   ├── handlers
    │   │   └── main.yml
    │   ├── tasks
    │   │   └── main.yml
    │   └── templates
    │       ├── 10-base.hcl.j2
    │       └── conf.j2
    ├── nomad-client
    │   ├── defaults
    │   │   └── main.yml
    │   ├── meta
    │   │   └── main.yml
    │   ├── tasks
    │   │   └── main.yml
    │   └── templates
    │       └── 20-client.hcl.j2
    ├── nomad-server
    │   ├── meta
    │   │   └── main.yml
    │   ├── tasks
    │   │   └── main.yml
    │   └── templates
    │       └── 20-server.hcl.j2
    ├── ssh_keys
    │   └── tasks
    │       └── main.yml
    └── xbps-repoconf

25 directories, 23 files
Those 23 files really are all you need to build a Nomad cluster on Void Linux. It may seem slightly odd then that this container is based on Alpine and not Void, especially when Void provides comparatively sized container base images. This boils down to copy-pasta, where I’m re-using some other development work on putting Ansible into a container.
This gets us pretty far along, but now what we’ve got is Ansible running in a container on every host in the fleet. How do we get Ansible to configure the host itself, especially if we don’t want to give Ansible an SSH principal to be able to connect from the container to the machine that way. There are lots of neat ways you can do this, but the approach I’ve settled on for now is using a special connection manager and giving the Ansible container some elevated security permissions.
Let me introduce you to community.general.chroot. This connection
plugin allows you to use Ansible to manage chroots. This is already
interesting in and of itself, but how does this help us use Nomad to
run Ansible on the actual physical host? There’s nothing technically
stopping us from claiming that / is a chroot and going there, and
then applying Ansible to our “chrooted” environment. Well, almost
nothing. There are a few things you have to change to make this work.
By default, Nomad won’t give you access to arbitrary paths on the host filesystem. This is a good thing, and it helps keep your machines secure. You can expose host paths via a number of ways, but in my case, I took the lease secure of them that offered me the most flexibility while doing development work. I enabled Docker Volumes support which enables me to mount arbitrary host paths to a container. The better way to do this would be to create a Nomad Host Volume, but those exist in every namespace concurrently. If there was a way to make Host Volumes, which provide a named handle to a specific base directory, exist in only a single namespace then this would be easy. You could create the volume in the namespace, restrict access to that namespace, and call it a day. This may be possible to do using a combination of wildcard deny rules and explicit allow rules, but this is unclear from Nomad’s documentation and is something I want to play with further.
Once we have the ability to mount the host filesystem, this is pretty
straightforward. All we need to do is mount the host filesystem, use
the chroot driver to access it, and set ansible_host to wherever we
mounted the host filesystem. This makes the entire system reasonably
transparent. To make the system even more transparent, we run the
docker container in privileged mode, which puts it into the host
namespaces for a number of different datatypes. Finally, we run the
container in the host’s network namespace so that it sees what the
host sees. This has the net effect of providing a portable runtime to
Ansible that then has full access to the host to actually configure
it.
As near as I am able to tell, this is side-effect free with one
notable exception. The ansible_virtualization fact is always set to
docker. I’m fairly confident that this is a fingerprinted fact
coming from some environment variable, but because I don’t use this
variable anywhere, I haven’t been bothered enough to fix the incorrect
detection yet. This is almost certainly some weird interaction
between the environment the container spawns with and the chroot
driver, but since it hasn’t broken anything it hasn’t moved up the
priority list to be fixed yet.
Putting all of this together, we can arrive at the following Nomad jobspec, which makes Ansible just another task that Nomad is aware of:
job "ansible" {
  name = "ansible"
  type = "sysbatch"
  datacenters = ["MATRIX-CONTROL", "MATRIX"]

  parameterized {
    payload = "forbidden"
    meta_required = ["COMMIT", "ANSIBLE_PLAYBOOK"]
    meta_optional = []
  }

  group "ansible" {
    count = 1

    network { mode = "host" }

    task "ansible" {
      driver = "docker"
      config {
        image = "registry.matrix.michaelwashere.net:5000/ansible/ansible:${NOMAD_META_COMMIT}"
        network_mode = "host"
        privileged = true
        command = "/ansible/venv/bin/ansible-playbook"
        args = [
          "-D", "${NOMAD_META_ANSIBLE_PLAYBOOK}",
          "-c", "community.general.chroot",
          "-e", "ansible_host=/host",
          "--limit", "${node.unique.name}",
        ]
        volumes = ["/:/host"]
      }
    }
  }
}
This short (35 lines!) file allows us to deploy Ansible across any machine that Nomad is aware of with the full scheduling speed that Nomad has. If you aren’t aware, Nomad is Very Fast at scale. One of my biggest complaints with Ansible is that its slow. This slowness is bad for iteration, and if you can’t iterate quickly or re-apply your configuration data at speed, you’re likely to enter into a world of slowly drifting configs. Since my runtime for any Ansible playbook is now effectively however long the slowest host is, I can run my playbooks on a timer to ensure no configuration has drifted. This doesn’t hold a candle to immutable infrastructure systems like The ResinStack but its still a much better situation than most production systems I’ve seen in my career, and does so without a clunky external scheduler beyond Nomad.
Sure, you could achieve this kind of workflow with Puppet or Chef, but you’d have to install additional daemons, additional scheduling components, and additional runtime components to make it happen. By using Nomad as the execution scheduler for Ansible, I’m able to have supervised, daemon-based Ansible runs at no cost, while leveraging all the logging, monitoring, and access control systems I already put in place for my Nomad cluster that is going to run other applications that I actually care about. This last part is extremely important, because I often see infrastructure engineering teams getting lost in technology for technology’s sake, but somewhere there is a hopefully revenue generating application that all of your infrastructure runs, and anything that isn’t necessary to run that service is overhead - including your configuration management.
Best of all, the user experience here is extremely simple. I have a git hook that builds the container, pushes it to an internal registry, and then requests Nomad to apply it. If I want to re-apply changes that I’ve already run, I can either use the CLI or Nomad’s web interface to accomplish this:
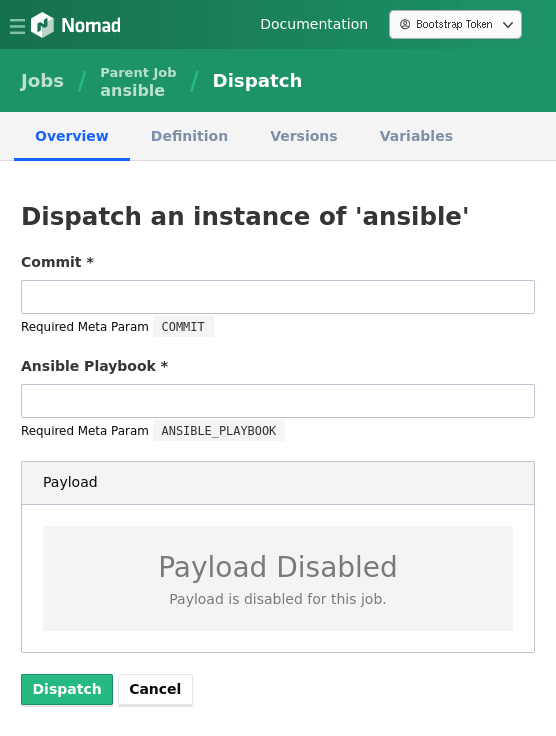
All that’s needed to dispatch the job is to know the commit and playbook I want to run. I intentionally did not make these default to anything, because I don’t want to get into the habit of using this interface. Manually dispatching Ansible should be to resolve a problem, not as a standard workflow.
This brings us to the final challenge with using Ansible in this Nomad supervised workflow: observing it. With Nomad no longer attached to the terminal on a machine I’m sitting in front of, how can I get the logs, the status of the plays, and information about problems that may have happened during the run? There are lots of solutions to this problem, and the logs are in fact already captured by the syslog which is streamed to my cluster-wide logging system. For Ansible, however, I want something more like the status readout that happens at the end of a run in the terminal which provides quick at-a-glance type feedback.
Eagle eyed readers will already know my answer to this, because the configuration for it is in the Docker file above. I selected to use Ara which works as a callback logging plugin for Ansible and provides me not only a way to observe any changes made by the automated system, but also is configured to keep track of playbooks I run by hand.
We’ve covered a lot of ground in this post, and hopefully you’ve learned something new about either a way you can run your Ansible playbooks, that Nomad isn’t that complicated, or that Ara provides a great single-pane of glass for when configuration was last applied. In the next post I’ll look at the core services that are part of my cluster to provide HTTP routing, logging, and container management.